Categories
Brands
Features
Top Rated
Our Showroom
Categories
Brands
Features
Top Rated


Our Showroom


Installing the Infinity Eaze z3 Bidet Seat is a quick and straightforward process that most people can complete in 20–30 minutes with just a few basic tools. This step-by-step installation guide will walk you through everything you need to know.
00:00 – Introduction
00:27 – Tools
00:57 – Prep the Area
01:28 – Step 1: Install T-Connector
04:13 – Step 2: Remove Existing Toilet Seat
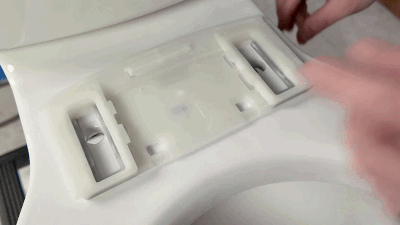
05:15 – Step 3: Install Bidet Mounting Plate
06:42 – Step 4: Secure Bidet to Mounting Plate
08:25 – Step 5: Connect Water and Power
09:47 – Step 6: Set up Remote and Test Bidet
Your new Infinity Eaze z3 includes all of the parts required for installation, but before you begin you will want to have a few extra tools on hand:
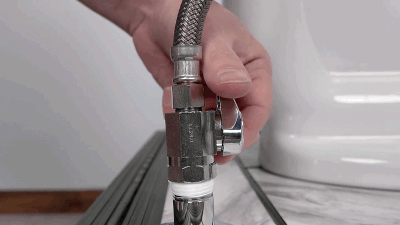
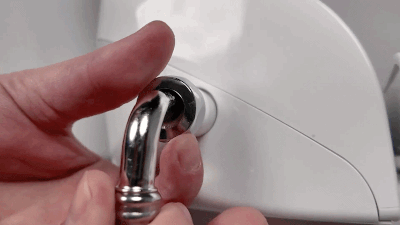
Before installing your Infinity Eaze Z3 bidet seat, you’ll first need to prepare the toilet’s water connection.
Pro Tip: If your current water supply line is too long or rigid you can replace it with a shorter, flexible braided steel supply line from your local hardware or plumbing supply store.
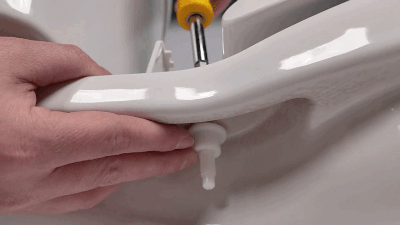
Pro Tip: If you are installing your bidet seat on top of a riser, you will need longer 6” bolts, which can be found here.
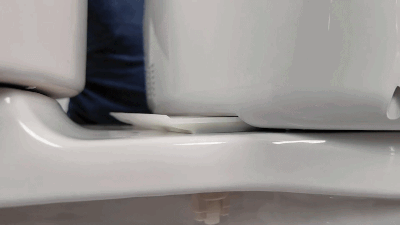
If adjustment is needed:
Pro Tip: If you need to remove the bidet from the mounting bracket after you have locked it into place, grab the lower housing and rotate up slightly and then wiggle forward and remove.
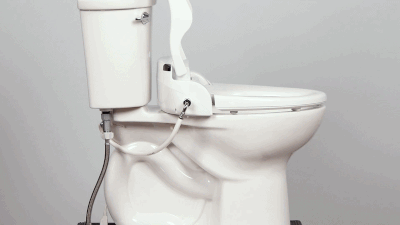
Congratulations on installing your Infinity Eaze z3 Bidet seat! Make sure you hold on to your instruction manual for care and troubleshooting tips.
Have more questions? Reach out to our team of bidet experts!
Not sure where to start? Our quiz makes it easy to find the bidet of your dreams.
Get your recommendation now!
Many Bidets’ Privacy Notice
This privacy notice discloses the privacy practices for ManyBidets.com. This privacy notice applies solely to information collected by this website.
We will use your information to respond to you, regarding the reason you contacted us. We will not share your information with any third party outside of our organization, other than as necessary to fulfill your request, e.g. to ship an order.
Unless you ask us not to, we may contact you via email in the future to tell you about specials, new products or services, or changes to this privacy policy.
Your Access to and Control Over Information
You may opt out of any future contacts from us at any time. You can do the following at any time by contacting us via the email address or phone number given on our website.
Security
We take precautions to protect your information. When you submit sensitive information via the website, your information is protected both online and offline.
Wherever we collect sensitive information (such as credit card data), that information is encrypted and transmitted to us in a secure way. You can verify this by looking for a lock icon in the address bar and looking for “https” at the beginning of the address of the Web page.