Brands
Categories
Features
Top Rated
Our Showroom
Brands
Categories
Features
Top Rated


Our Showroom


Topping off your TOTO WASHLET+ system with the S7 or S7A WASHLET bidet seat gives you a lot of luxurious perks – including optional automatic flushing. Once you’ve completed the basic WASHLET+ installation process, adding the auto flush kit is a breeze! Watch the video below and keep reading to learn how you can enjoy a completely hands-free bathroom experience in minutes.
Video Chapters:
00:00 – Introduction
00:18 – Step 1 – Turn off water and drain tank
00:38 – Step 2 – Disconnect hose and center column
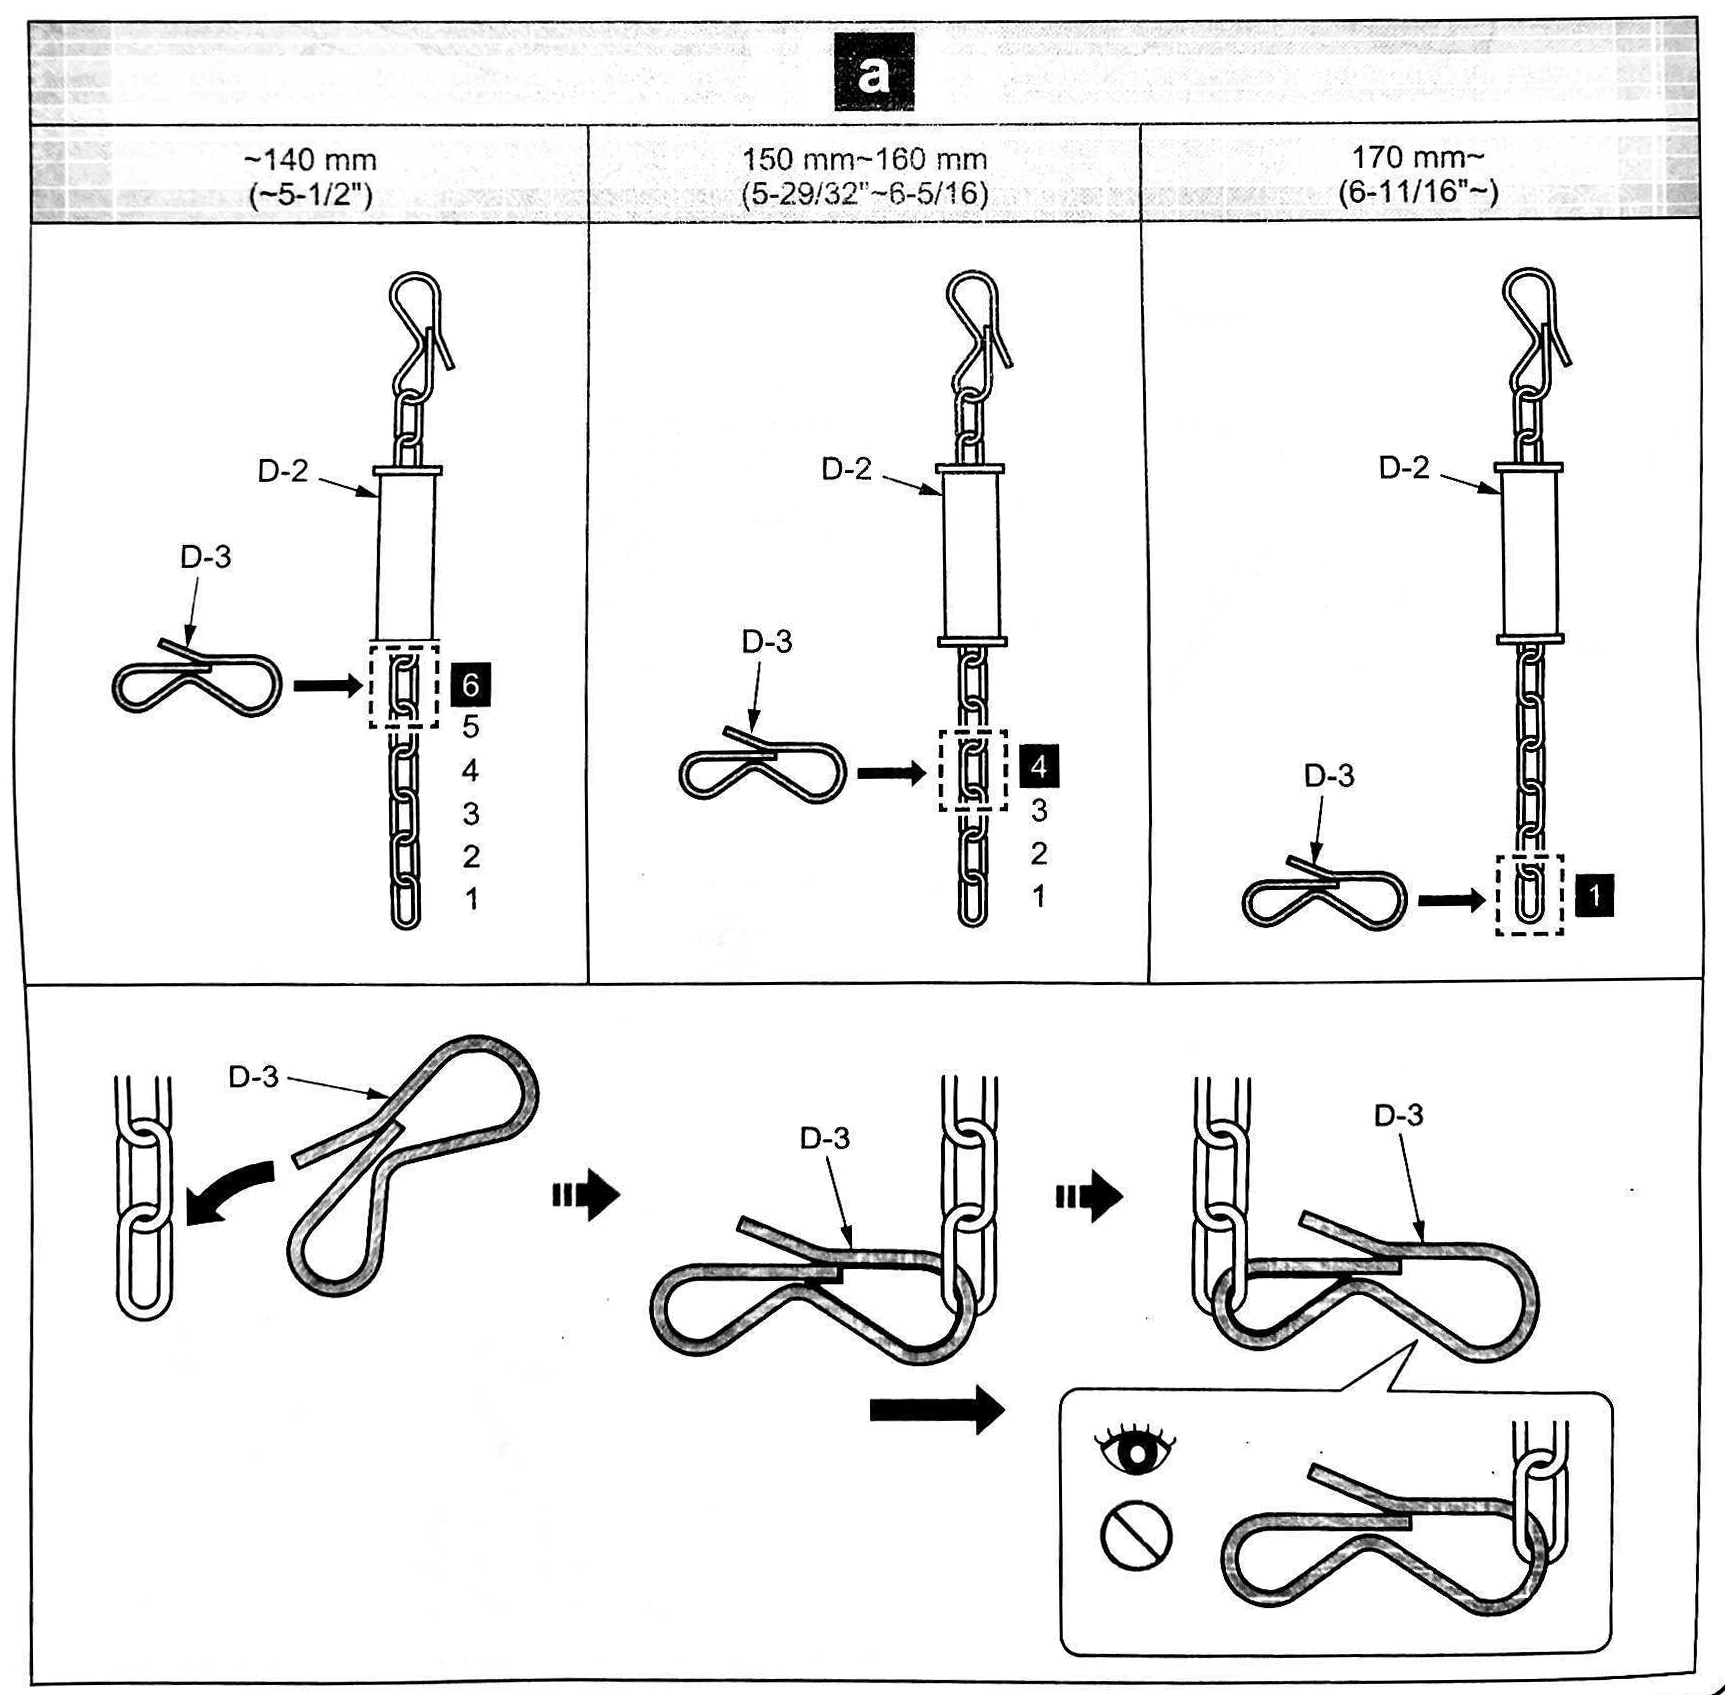
01:00 – Step 3 – Connect chain and reinstall column
02:26 – Step 4 – Connect and install auto flush controller
03:15 – Step 5 – Plug into seat and install buttons
04:32 – Step 6 – Test the flush
This walkthrough uses the Nexus – one of our favorite WASHLET+ toilets – and the THU857 auto flush kit. The installation process will be the same for all TOTO WASHLET+ toilets with a 1.28-gallon single flush and the THU857 auto flush kit.
The auto flush kit comes with everything you need to get it up and running. All you’ll need to have on hand is a tape measure! A pair of needle-nosed pliers can also help with connecting the clip to the center column.
With the auto flush kit fully installed and the lid back in place, your WASHLET+ system is all set for convenient automatic flushing!
If you run into any issues installing your auto flush kit, reach out to us! Want your own touchless toilet experience but don’t have auto flushing? We can help you get whatever you need, from an auto flush kit to a full WASHLET+ system.
Meghan Oliver is a writer and content manager with Many Bidets. Her work has appeared in Nonprofit World magazine and on Psych Central, but she specializes in behind-the-scenes content for small businesses and nonprofit organizations. Meghan is passionate about conservation, creatures of all kinds and the Oxford comma. When she's not writing, she's probably at the barn, on a hiking trail, in her native garden bothering the pollinators(,) or curled up with a book and a cat.
Not sure where to start? Our quiz makes it easy to find the bidet of your dreams.
Get your recommendation now!
Many Bidets’ Privacy Notice
This privacy notice discloses the privacy practices for ManyBidets.com. This privacy notice applies solely to information collected by this website.
We will use your information to respond to you, regarding the reason you contacted us. We will not share your information with any third party outside of our organization, other than as necessary to fulfill your request, e.g. to ship an order.
Unless you ask us not to, we may contact you via email in the future to tell you about specials, new products or services, or changes to this privacy policy.
Your Access to and Control Over Information
You may opt out of any future contacts from us at any time. You can do the following at any time by contacting us via the email address or phone number given on our website.
Security
We take precautions to protect your information. When you submit sensitive information via the website, your information is protected both online and offline.
Wherever we collect sensitive information (such as credit card data), that information is encrypted and transmitted to us in a secure way. You can verify this by looking for a lock icon in the address bar and looking for “https” at the beginning of the address of the Web page.