Categories
Brands
Features
Top Rated
Our Showroom
Categories
Brands
Features
Top Rated


Our Showroom


Installing a luxury integrated bidet toilet like the TOTO Neorest NX1 or TOTO Neorest NX2 may look intimidating at first, but we’re here to help break it down for you step by step. Both models follow the same general installation process, so this guide will walk you through what to expect, what tools you’ll need, and how each part of the installation comes together.
Before getting started, always review TOTO’s official installation manual and consider hiring a licensed plumber if you are not comfortable working with plumbing connections. You can also find a list of factory-trained TOTO plumbers and technicians here.
TOTO does not supply the flange bolts, so make sure you already have those available before beginning.

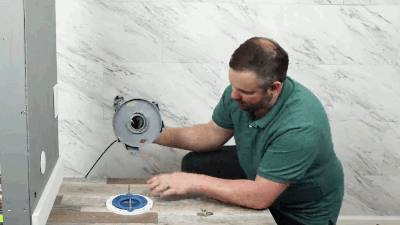
The first step is determining where the mounting brackets need to be installed. TOTO provides a paper template to help with this.
Place the template over the toilet flange and make sure the side marked “back wall side” is facing the wall. Center the template as closely as possible around the flange, then tape it down using painter’s tape so it does not shift while you work. Once the template is secure, locate the screw hole markings and drill the necessary holes into the floor.
After the mounting holes are drilled, remove the template and install the flange adapter.
Slide the flange adapter over the flange bolts. Make sure the manual flush cable points toward the back wall. If the cable is facing forward, the adapter is installed backward. If you are using a silicone seal, TOTO’s instructions may vary depending on the type of flange you have. For a metal flange, the sealant typically goes on the underside of the flange adapter. For a plastic flange, the sealant may be applied to the flange itself before setting it in place. Once positioned, add the washers and tighten everything down. The goal is snug, not overly tight.
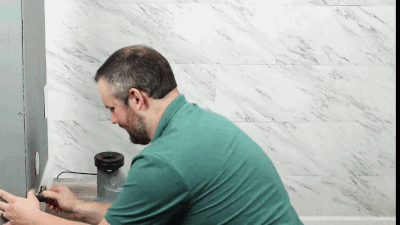
Next, install the water inlet connection. You will need a ½-inch female connection coming from the wall or inside the wall.
Before adding plumber’s tape, slide the decorative cover onto the inlet. Be sure to leave the foam piece in place as this helps hold the cover securely later. Apply plumber’s tape to the threads and then screw the water inlet into place.
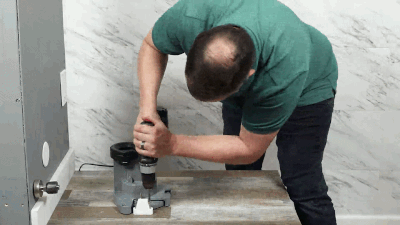
The mounting brackets are what the toilet will lock into once it is slid into position.
Using the holes you drilled earlier from the template, line up the brackets and screw them into the floor. If you are drilling into tile, TOTO provides plastic sleeves to help secure the screws properly.
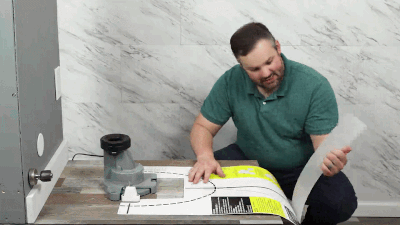
TOTO includes a second template to help position the actual toilet bowl. This template shows where the outside edge of the toilet base should land.
You will find a plastic sleeve on this template as well that helps the bowl slide into position without damaging the floor or the porcelain. Tape this template down carefully, but avoid placing tape underneath the area where the bowl will sit. If tape is placed beneath the bowl it will be difficult to remove the template later.
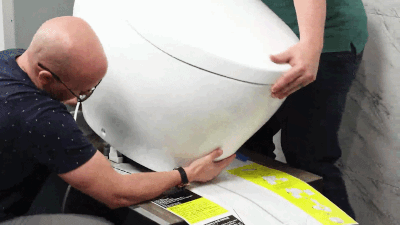
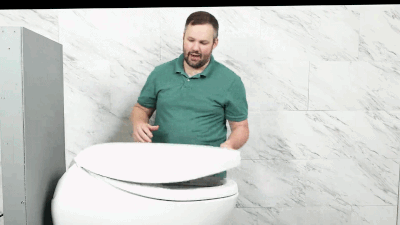
TOTO recommends using two people to lift and position the Neorest NX1 or NX2. These units are particularly heavy, so getting the bowl aligned correctly will be much easier with help.
Carefully place the bowl onto the plastic sliding sleeve and move it into position. When properly seated, the unit will fit into the rubber gasket on the flange adapter and the toilet will sit flush against the floor. Once the toilet is correctly positioned, lift the front of the bowl slightly and slide the template out.

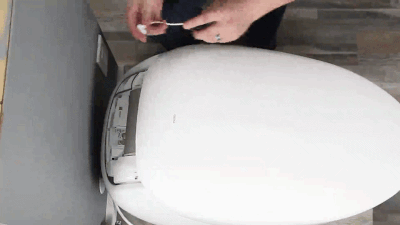
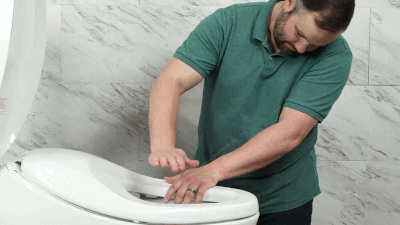
With the toilet in place, secure it to the mounting brackets using the provided screws.
A helpful approach is to start each screw with an electric screwdriver and then finish tightening by hand. Since the screws pass through porcelain, using a manual screwdriver at the end gives you better control and helps reduce the risk of cracking or damaging the bowl. After the screws are installed add the plastic screw covers. These covers are angled to match the contour of the toilet, so make sure they are installed right side up (you will see an arrow on the inside indicating the top).
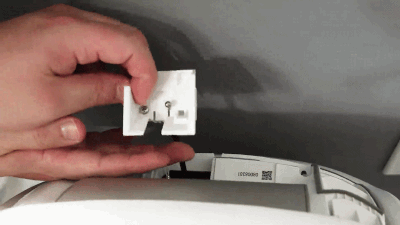
At the back of the toilet, feed the manual flush cable through the plastic pipe and into the main housing.
This step may take a little finesse. If the cable is pulled too far upward, do not try to force it back down from above. Instead, reach behind the toilet and gently pull it back down from the rear. Next, install the small plate that holds the manual flush cable and pull string. Feed each piece through its proper slot before tightening the plate with a manual screwdriver. Finally, feed the ball at the top of the manual flush cable through the plastic pull string. Pulling up on the string should activate the manual flush.
The Neorest NX1 and NX2 include a small black battery pack. This is not installed during the standard installation and may not appear in the main installation steps at all.
The battery pack is used during a power outage. If the power goes out, insert batteries into the pack, plug it into the back of the toilet and use the manual flush pull string to activate the flush. Once finished, unplug the battery pack and replace the cover.
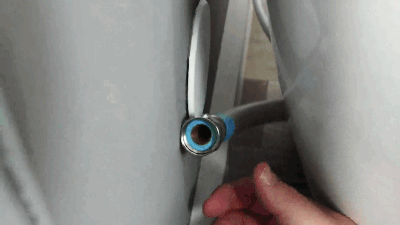
Now connect the water hose to the water inlet.
Before attaching it make sure the blue gasket is inside the hose. Hand-tighten the connection first and then use a wrench to get it snug. Don’t over-tighten. Turn the home’s water supply back on, then open the toilet’s water supply using a flathead screwdriver. Check carefully for leaks around the connection. Once everything looks good you can slide the decorative cover into place over the foam grip.
Plug the unit into the electrical outlet.
Once the power is connected the toilet may begin running through its startup and self-cleaning process. You may hear the nozzle move in and out, water begin to run through the system, and PREMIST activate inside the bowl. Some gurgling is normal during the first startup as air works its way out of the system.
Next, install the remote holder on the wall.
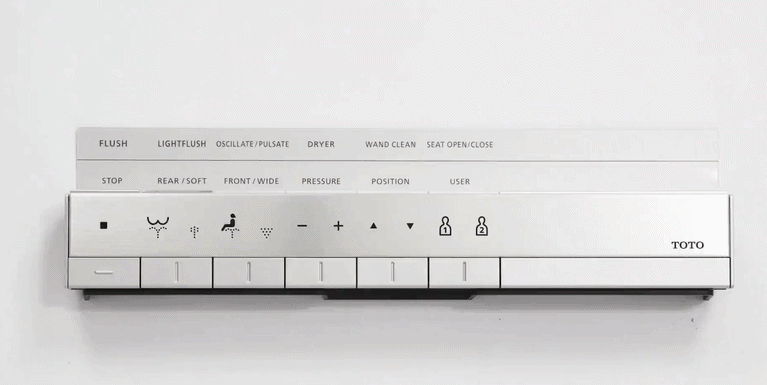
One important detail: do not throw away the included remote cheat sheet. The Neorest remote has a clean, minimal design without words on the buttons, so this guide sits behind the remote and explains what each button does. Line the cheat sheet up with the remote holder before mounting it to the wall. Once installed, the remote sits neatly over the guide.
Insert the included batteries into the remote and test the unit.
The Neorest NX1 and NX2 use a skin sensor to detect when someone is seated. To test the wash functions simply cover the sensor with your hand or a damp cloth. Once the sensor is activated, press a wash button on the remote. If the wash starts then the system is working. When you remove your hand from the sensor the wash should stop automatically.
You can also test the flush at this point. Although the Neorest uses a pump-assisted flush, it is surprisingly quiet compared to what many people expect.
We hope this guide has made the installation of the TOTO Neorest NX1 and NX2 seem more approachable. While these are premium units, the install process can still be undertaken by most experienced DIYers. Once installed, you’ll be ready to experience one of the most luxurious integrated toilets TOTO offers.
Have questions about a different unit? Reach out! Our knowledgeable team is here to help provide tailored recommendations and answer any of your bidet questions. Our bidet experts have heard it all, so you can share your story and get dedicated support with no judgment.

Daniel Johnson is the owner and founder of Many Bidets. After experiencing the health benefits for himself, Dan launched Many Bidets with the goal of helping everyone enhance their hygiene and well-being with the perfect bidet. More than 20,000 bidets later, he remains dedicated to providing unmatched customer education and support. A certified Aging in Place specialist, Dan is passionate about helping caregivers and their loved ones maintain dignity and independence in the bathroom. In addition to leading the team, Dan shares his in-depth bidet knowledge with the world as the face of the Many Bidets YouTube channel.
Not sure where to start? Our quiz makes it easy to find the bidet of your dreams.
Get your recommendation now!
Many Bidets’ Privacy Notice
This privacy notice discloses the privacy practices for ManyBidets.com. This privacy notice applies solely to information collected by this website.
We will use your information to respond to you, regarding the reason you contacted us. We will not share your information with any third party outside of our organization, other than as necessary to fulfill your request, e.g. to ship an order.
Unless you ask us not to, we may contact you via email in the future to tell you about specials, new products or services, or changes to this privacy policy.
Your Access to and Control Over Information
You may opt out of any future contacts from us at any time. You can do the following at any time by contacting us via the email address or phone number given on our website.
Security
We take precautions to protect your information. When you submit sensitive information via the website, your information is protected both online and offline.
Wherever we collect sensitive information (such as credit card data), that information is encrypted and transmitted to us in a secure way. You can verify this by looking for a lock icon in the address bar and looking for “https” at the beginning of the address of the Web page.